Military Models.
-
Well since most of you guys are military fanatics, I am sure there is a modelling community here. So share your military models here. Gundams and macross included....
-
anyway these are mine. 1/32 F-15 and F-16. Currently working on 2 F-5s and an F-14.

-

a 1/2 completed F-15. My handphone next to it for size comparison
[/img] -

my F-16 cockpit. Well, it was done ages ago. But might as well show it. -
another image with a pilot in it. Resolution is not too good.

Well thats all for tonight. If you guys like it, i will do a full build process of my 1/32 Tomcat -
I had a F-16,F15,F117,A10,B25,Mig29,AV8B and a Ka50.Lol unfortunately my cousin smashed a football into the shelf i kept them all in heh. All got smashed and i threw them when i moved.
Oh well
Nice job btw. -
Shucks what a waste. RSAF should invest in more footballs to use as part of an intergrated air defense system.
-
I have the F15, F16, A10, A4, and Apache, now turning to tanks, working on M1, Challenger2. Anybody know how to do rusting or aging with spray painting?
-
for rusting effects, first you spray red brown on the model then you over coat it with the body color. After that you get a fine sand paper, maybe grade 1000 slowly sand until you see the red brown.Originally posted by sgdiehard:I have the F15, F16, A10, A4, and Apache, now turning to tanks, working on M1, Challenger2. Anybody know how to do rusting or aging with spray painting?
If not, undercoat with red brown then use your air brush and paint a few small thin coats
For some dust effects, you can attempt preshading or post shading. For pre shading, spray black lines on the model first. I.e on the edges, panel lines, rivet lines, on the engine cover etc. After that you spray the body colour. So you have a darker tone and a lighter tone.
For post shading, you spray the body color first, then you use your air brush, and spray a mixture of 1 part black and 10 part tinner on the lines. Sounds easy, but your hand must be very steady. Practice on a waste plastic first.
And to replicate sandy dusty effects, take brown pastel chalk, or yellow pastel chalk, grind it into powder. You can either brush (hand paint) the powder dry on the vehicle or you can mix it with soap solution and do wet brushing. It looks nice, but your model will be very fragile to touch. So try to spray a layer of dull coat.
To replicate mud effect, take some clear paint, mix it with chalk dust until you get a goooey effect, then hand paint on the mud guards, tracks, wheels etc.
Finally, don't forget to darken your panel lines. One method is by washing. If you are using lacquer based paints, you can just use a mixture of 1 part black and 10 part tinner but one drop of it on the panel line and see it run through via capillary action.
If you are using enamel paint, spray a layer of gloss coat on the model first, then do the washing as stated above. After that spray with dull coat.
Another method is to use a dark pencil, about 6B or 7B and draw along the lines. After that spray with dull coat.
I don't reccomend using those gundam fine markers. Makes your model damn cartoonish with those extra black panel line.
The shading method and the panel lines will bring out alot of details on your model.
Finally, don't forget to have fun. -
btw, get an airbrush and a compressor. You will never regret buying them.
-


M2 Bradley
No weathering, no special effects haa...
Hope to learn alot more abt modellings.
Frequently visit www.armorama.com to see how the pros do it. -
lol yea well too bad.Originally posted by Shotgun:Shucks what a waste. RSAF should invest in more footballs to use as part of an intergrated air defense system.
I might move into making battleships though,those look fun. And tanks too hah.
Anyway, MBT do u have a work space or do u just push stuff off ur table to do it? -
I had a couple of models myself during my sec school days.
An F/A-18C, MiG-23, F-15A, F-16C, and an Apache (no-longbow). Being more technical than artistic, my models were well constructed, edges nicely filed... but my painting was CRAP. Gave up alr... mainly cos I got another kid nephew now, and no place to display. Except for a 2 small shelves with some DIE CAST metal Hueys, Cobra, an F/A-18C on. Oh, and my fav... VF-1J.
Btw, assemble some basic parts first, then paint before assembling the whole thing? Or do you paint first, then assemble everything? If so, how to ensure the uniformity of camouflage patterns?
Anywhere got sell a BX model? -
haha i normally do my air brushing stuff in the balcony, throw a giant piece of cardboard on the floor and start working. For my assembly, i just do it in my living room, normally on a collapsable table.Originally posted by |-|05|:lol yea well too bad.
I might move into making battleships though,those look fun. And tanks too hah.
Anyway, MBT do u have a work space or do u just push stuff off ur table to do it?
Haha I did battleships too, musashi bishmark and prince of wales. But that time i didn't know what airbrushing is, so i did it out of the box without painting. When i am free i am going to respray everything. -
For smaller parts that have to be fitted into the main body, say the cannon or the jet turbines, paint first.Originally posted by Shotgun:I had a couple of models myself during my sec school days.
An F/A-18C, MiG-23, F-15A, F-16C, and an Apache (no-longbow). Being more technical than artistic, my models were well constructed, edges nicely filed... but my painting was CRAP. Gave up alr... mainly cos I got another kid nephew now, and no place to display. Except for a 2 small shelves with some DIE CAST metal Hueys, Cobra, an F/A-18C on. Oh, and my fav... VF-1J.
Btw, assemble some basic parts first, then paint before assembling the whole thing? Or do you paint first, then assemble everything? If so, how to ensure the uniformity of camouflage patterns?
Anywhere got sell a BX model?
For the main body, assemble the whole thing, do your puttying/ filling of gaps/ sanding before your spray. This way your camouflage will be uniform.
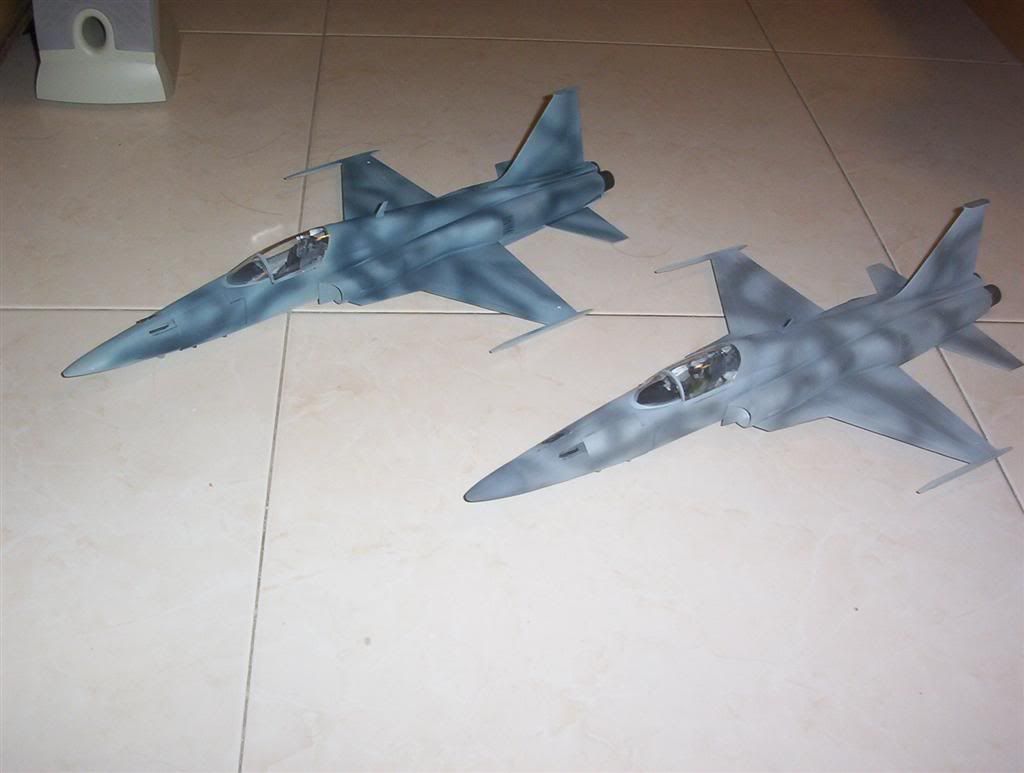
Well, I am almost complete with my twin F-5s, when i am finished with them i will take a few shots of my camou scheme. -
Did you buy it ? where to buy ?
-
hobby stores all over singapore.Originally posted by Unidentified:Did you buy it ? where to buy ?
I am a regular customer of the orchard store @ specialist centre opp centrepoint.
Sometimes I go to the Hobby point at Tiong Bahru Plaza
Another good place is miniature hobbies at marina square.
Sunshine plaza has alot of model stores too. -
thank you very much. will try it out.Originally posted by CenturionMBT:for rusting effects, first you spray red brown on the model then you over coat it with the body color. After that you get a fine sand paper, maybe grade 1000 slowly sand until you see the red brown.
If not, undercoat with red brown then use your air brush and paint a few small thin coats
For some dust effects, you can attempt preshading or post shading. For pre shading, spray black lines on the model first. I.e on the edges, panel lines, rivet lines, on the engine cover etc. After that you spray the body colour. So you have a darker tone and a lighter tone.
For post shading, you spray the body color first, then you use your air brush, and spray a mixture of 1 part black and 10 part tinner on the lines. Sounds easy, but your hand must be very steady. Practice on a waste plastic first.
And to replicate sandy dusty effects, take brown pastel chalk, or yellow pastel chalk, grind it into powder. You can either brush (hand paint) the powder dry on the vehicle or you can mix it with soap solution and do wet brushing. It looks nice, but your model will be very fragile to touch. So try to spray a layer of dull coat.
To replicate mud effect, take some clear paint, mix it with chalk dust until you get a goooey effect, then hand paint on the mud guards, tracks, wheels etc.
Finally, don't forget to darken your panel lines. One method is by washing. If you are using lacquer based paints, you can just use a mixture of 1 part black and 10 part tinner but one drop of it on the panel line and see it run through via capillary action.
If you are using enamel paint, spray a layer of gloss coat on the model first, then do the washing as stated above. After that spray with dull coat.
Another method is to use a dark pencil, about 6B or 7B and draw along the lines. After that spray with dull coat.
I don't reccomend using those gundam fine markers. Makes your model damn cartoonish with those extra black panel line.
The shading method and the panel lines will bring out alot of details on your model.
Finally, don't forget to have fun. -
-
haha thats one of my favourtite webbys for modelingOriginally posted by duotiga83: -
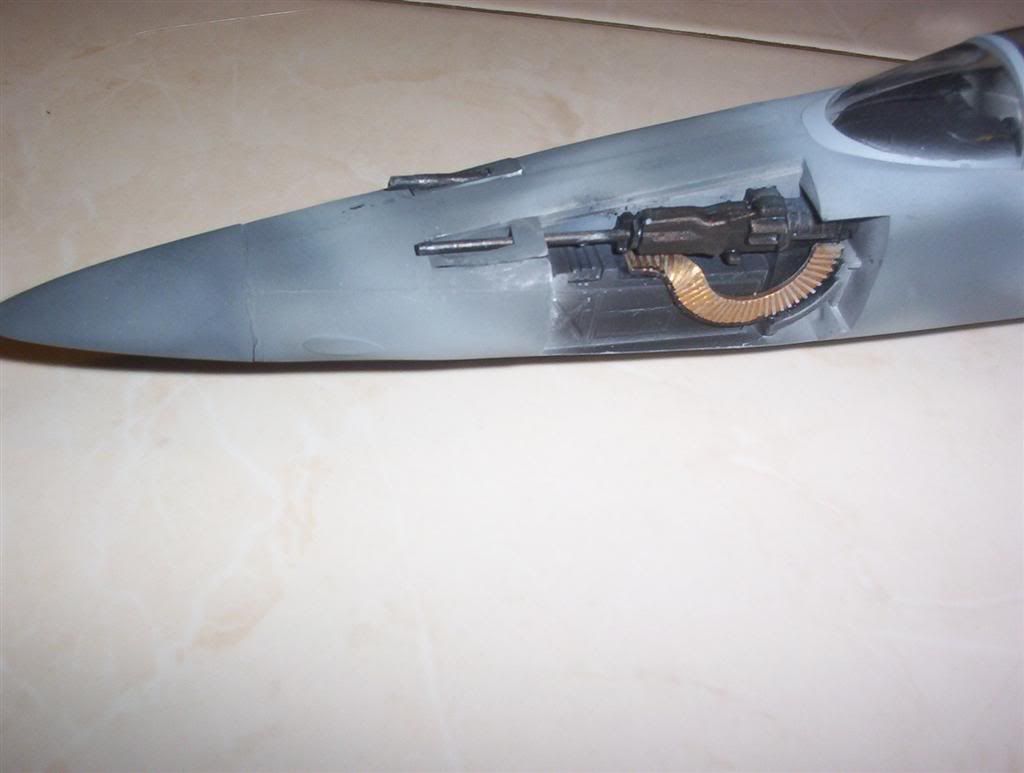
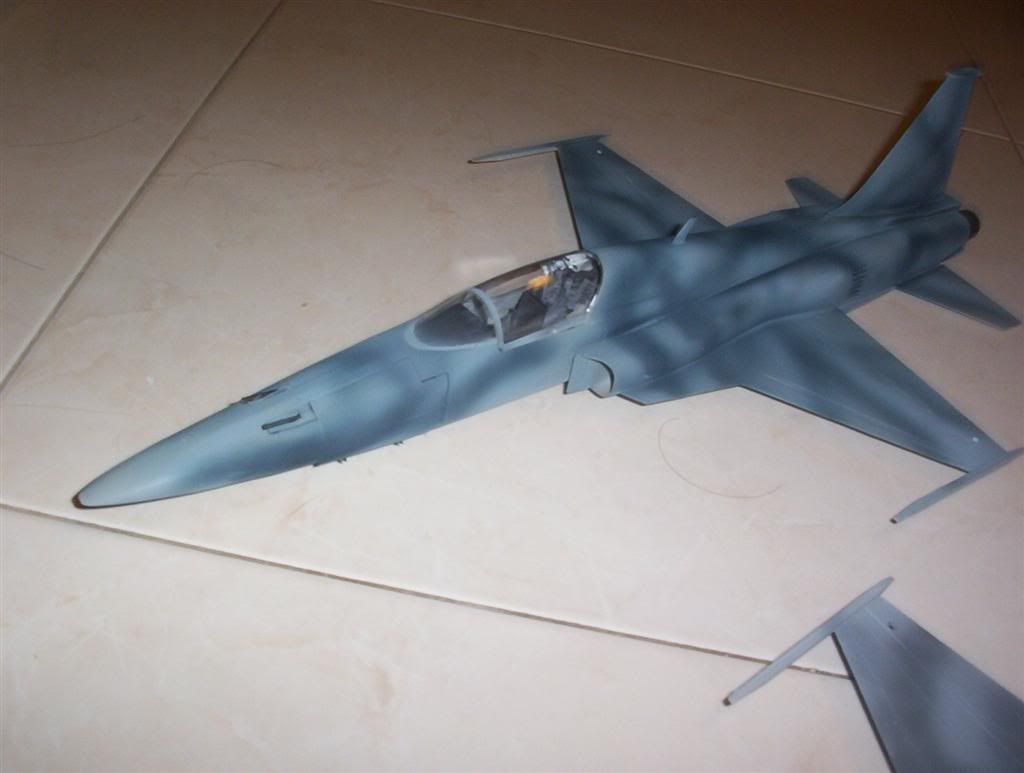
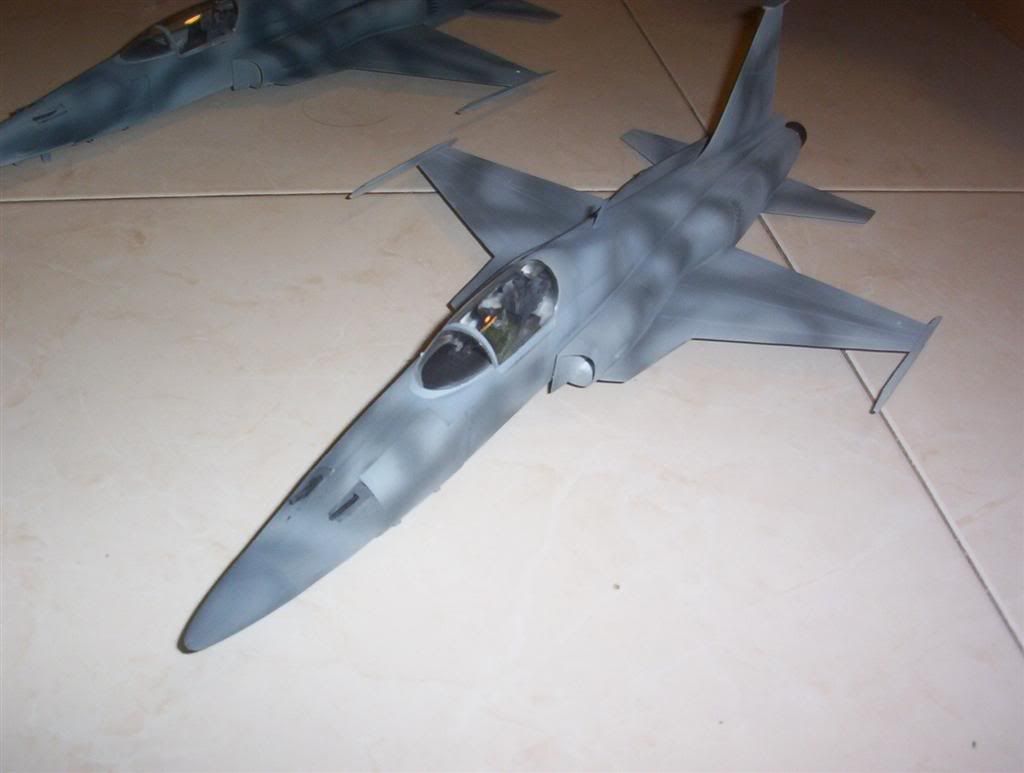
as promised, my F-5s ...pls comment.
[/img] -
-
-
-
nicee